1. Sweet Potato Pecan (& Bourbon) Pie
Make some Maple Pecan (Bourbon!) Ice Cream to go on top if you're really in the zone. Get the recipe at Closet Cooking.
Source: 2.bp.blogspot.com
Before we proceed any further, please note that although some of
these recipes refer to the bourbon in them as "optional," it is not. For
best results, please do not hesitate to add 1 Tbsp. bourbon to whatever
quantity is called for.
Servings: makes 6+ servingsPrep Time: 10 minutes
Cook Time: 50 minutes
Total Time: 60 minutes Printable Recipe
Ingredients
- 2 cups sweet potato, roasted, scooped and mashed
- 2 eggs, lightly beaten
- 1/2 cup brown sugar
- 1/4 maple syrup (or golden syrup)
- 1 teaspoon vanilla extract
- 1/2 teaspoon cinnamon
- 1/4 teaspoon ginger
- 1/4 teaspoon nutmeg
- 2 tablespoons bourbon (optional)
- 1 pie crust
- 1 1/2 cups pecan halves
- 1/2 cup brown sugar
- 1/2 cup maple syrup (or golden syrup)
- 2 eggs (lightly beaten)
- 2 tablespoons butter
- 1 teaspoon vanilla
- 1 tablespoon bourbon (optional)
Directions
- Mix the sweet potatoes, eggs, sugars, vanilla, cinnamon, ginger, nutmeg and bourbon in a large bowl and pour it into the pie crust.
- Place the pecans on top of the sweet potato filling.
- Mix the sugar, maple syrup, eggs, butter, vanilla and bourbon and pour it on top of the pecans.
- Bake in a preheated 375F oven until the pastry id golden brown and the pecan layer is set, about 40-60 minutes.
2. Bourbon Pumpkin Cheesecake
 Serves 12 to 14
For crust
3/4 cup graham cracker crumbs (from five 4 3/4- by 2 1/4-inch crackers)
1/2 cup pecans (1 3/4 ounce), finely chopped
1/4 cup packed light brown sugar
1/4 cup granulated sugar
1/2 stick (1/4 cup) unsalted butter, melted and cooled
For filling
1 1/2 cups canned solid-pack pumpkin
3 large eggs
1/2 cup packed light brown sugar
2 tablespoons heavy cream
1 teaspoon vanilla
1 tablespoon bourbon liqueur or bourbon (optional)
1/2 cup granulated sugar
1 tablespoon cornstarch
1 1/2 teaspoons cinnamon
1/2 teaspoon freshly grated nutmeg
1/2 teaspoon ground ginger
1/2 teaspoon salt
3 (8 ounce) packages cream cheese, at room temperature
For topping
2 cups sour cream (20 ounces)
2 tablespoons granulated sugar
1 tablespoon bourbon liqueur or bourbon (optional)
Garnish: pecan halves
Make crust: Invert bottom of a 9-inch springform pan (to create flat bottom, which will make it easier to remove cake from pan), then lock on side and butter pan.
Stir together crumbs, pecans, sugars, and butter in a bowl until combined well. Press crumb mixture evenly onto bottom and 1/2 inch up side of pan, then chill crust, 1 hour.
Make filling and bake cheesecake: Put oven rack in middle position and Preheat oven to 350°F.
Whisk together pumpkin, eggs, brown sugar, cream, vanilla, and liqueur (if using) in a bowl until combined.
Stir together granulated sugar, cornstarch, cinnamon, nutmeg, ginger, and salt in large bowl.
Add cream cheese and beat with an electric mixer at high speed until creamy and smooth, about 3 minutes. Reduce speed to medium, then add pumpkin mixture and beat until smooth.
Pour filling into crust, smoothing top, then put springform pan in a shallow baking pan (in case springform leaks). Bake until center is just set, 50 to 60 minutes. Transfer to rack and cool 5 minutes. (Leave oven on.)
Make topping: Whisk together sour cream, sugar, and liqueur (if using) in a bowl, then spread on top of cheesecake and bake 5 additional minutes.
Cool cheesecake completely in pan on rack, about 3 hours.
Chill, covered, until cold, at least 4 hours. Remove side of pan and bring to room temperature before serving.
Do ahead: Baked cheesecake can be chilled, covered, up to 2 days.
3. Coconut Bourbon Balls
 Yields approximately 30
For the Bourbon Balls
2 cups vanilla wafers or graham crackers crumbs (ground fine)
2 cups chopped pecans (by hand or in food processor)
1 cup confectioners sugar, sifted
4 tablespoons unsweetened cocoa powder
1/2 cup bourbon or whiskey
6 tablespoons cane syrup or corn syrup
For the Ganache
2 cups sweetened coconut flakes
1 cup semisweet chocolate chips
4 tablespoons heavy cream
For the Bourbon Balls
In a large bowl, combine cookie crumbs, pecans, confectioners sugar, and cocoa powder. In another bowl, whisk together bourbon and syrup and then combine thoroughly with dry mixture (I find using my hands works best). Allow to sit for a couple of minutes.
Using a small scoop (I prefer a spring-release ice cream scoop), spoon out rounds of the bourbon ball mixture, mashing flat against the side of the bowl to create a flat bottom. Release onto a sheet pan.
For the Ganache
In a food processor, process coconut flakes into small bits. Combine chocolate chips and heavy cream in a glass bowl and microwave one minute to one minute and twenty seconds. Stir until chocolate is melted and glossy.
Dip bourbon balls in melted chocolate (you don't have to coat the flat bottom surface), reheating chocolate as necessary, and place on a cooling rack set on top of wax paper. Sprinkle coconut on top of balls, using fingers to cover the sides thoroughly. Re-use the leftover coconut that falls through the cooling rack wires, if necessary. Allow to set for at least a couple of hours, or overnight (they taste even better after the flavor has a chance to mellow). If you don't like coconut, feel free to just cover them in ganache and allow to set overnight.
Store in an airtight container for up to a week.
Spiced Bourbon Apple Pie
If you are only going to bake one thing this season it should probably be an apple pie. Why are you only baking one thing though!? Maybe you're allergic to ovens. Maybe you have a phobia of flour. I don't know. I don't want to judge here. But guys, can we just bake a pie today or what?
And while we're at it, let's put some bourbon in that pie, ok? If you've never baked with booze before don't fret. We're really just after the flavor: caramel, warm oak and vanilla. The actual alcohol content greatly decreases anytime you bake with liquor, as alcohol has a pretty low boiling point. Which is why you can make homemade vanilla extract with vodka. Science.
First let's talk crust. You can buy one or make your own. For this pie I made my own. I love a flaky, unsweetened crust. Perfect backdrop for a sweet pie with ice cream. :)
Perfect pie crust, makes one double crust pie (or two single crusts. Math.)
Needed: 2 cups flour, 1/2 teaspoon salt, 15 tablespoons cold butter (almost 2 sticks, but not quite) and 1/4 cup + 1 tablespoon cold water.
In a food processor combine the flour and salt, pulse for a second or two. Cut in the butter and pulse until just crumbly. Now slowly pour in the water as the food processor is turned on low. (You can also do these steps by hand with a little more effort, I'm just lazy.) Once you've added all the water use your clean hands to work the dough into a ball. Cover in plastic wrap and chill for an hour (or up to overnight). When you're ready to use your dough let it sit out on the counter for a few minutes before rolling out.Spiced Bourbon Apple Pie, filling for one pie.
Needed: 3-4 sour apples, 1/2 cup milk, 1 tablespoon corn starch, 2 tablespoons bourbon, 2/3 cup brown sugar, 1 teaspoon cinnamon and 1/2 cup chopped pecans (optional).
Peel and thinly slice the apples. As you can see from the photo I believe in very thinly sliced apples. The thinner your slices the more area for the spiced bourbon coating to stick to. I use a Mandolineand highly recommend them. It's one of my favorite kitchen tools. Set aside your apples and in a small bowl whisk together the milk, corn starch, bourbon, cinnamon and sugar. Pour over the apples and gently mix them up so that all slices get coated. Add in the pecans if using. Roll out your pie crust and lay in your prepared baking dish. Pour in the filling and lay on the top pie crust. Make sure to add a few slits to the top pie crust to allow steam to escape as baking. I crimped my edges using the side of a fork and I added a little label using Alphabet Cookie Cutters
. Brush the top with an egg wash and bake at 375 F for an hour.
If you don't have or don't want to use bourbon you can substitute 2 teaspoons vanilla extract instead. Bake a pie this week! Your house will smell amazing. xo. Emma
Browned Butter & Bourbon Blondies
Camping in the fall is always the best. Cool crisp nights, blazing, crackling fires, fleece jackets and hiking boots are just some of my favorite reasons to pack the camper and head to the mountains. I also love to bake something special to share at the end of a wonderful day playing outside. Blondies are a moist and sweet, buttery treat that will melt in your mouth and are easy to whip up in no time. Cut into bite sized squares they also travel very well. They traveled well to the Shenandoah Mountains, but I'm afraid they did not make it home again.
I was looking for something a little different so I added bourbon, toasted walnuts, milk chocolate chips and browned butter to this batch. This was a super successful combination of flavors. I was inspired by my Derby Day Pie and adapted a base recipe for Blondies originally published by Cooks Illustrated in July, 2005. This is a grown up dessert as you get hints of the smooth mild bourbon along with the toasted nuts and milky chocolate.
Browned Butter & Bourbon BlondiesBrowned Butter & Bourbon Blondies(slightly adapted from a recipe published July 2005 by Cooks Illustrated)1/2 cup walnuts3/4 cup unbleached all-purpose flour, plus 1 tablespoon1/2 teaspoon baking powder1/4 teaspoon salt6 tablespoons unsalted butter, browned and cooled3/4 cup packed light brown sugar1 egg1 teaspoon vanilla2 tablespoons bourbon1/2 cup milk chocolate chipsPreheat oven to 350 degrees.In a small pan on medium heat, melt the butter stirring occasionally. Cook the butter until it begins to have a nutty smell and turns an amber color. Do not overcook or it will burn easily. Remove the browned butter to a glass bowl or cup and set aside to cool.Spread the walnuts in a single layer on a parchment lined baking sheet. Bake at 350 degrees for about 15 minutes or until they are golden brown. Transfer the nuts to a cutting board and chop lightly. Set aside.Cut a length of parchment paper to fit a 8x8 baking dish allowing the paper to come up to the top of the pan on both sides. Cut another sheet to fit in the opposite direction also trimming at the top of the pan. Spray the parchment paper lightly with cooking spray. Set aside.Whisk 3/4 cup flour, baking powder and salt together in a small mixing bowl. Set aside.In another medium mixing bowl combine the browned butter and brown sugar until blended. Add the egg and mix well. Blend in the bourbon and vanilla and mix just until incorporated. Fold the dry ingredients into the butter mixture just until combined. Do not over-mix.Add the remaining 1 tablespoon of flour to the chocolate chips and toss until the chips are somewhat covered. Add the chocolate chips (with flour) and the toasted walnuts to the batter. Fold in gently. Spread the batter evenly in the prepared pan.Bake until the top is shiny, cracked and light golden brown, 22-24 minutes. Do not over-bake. Blondies should be chewy, not crunchy.Cool the Blondies in the pan then lift out using the parchment paper. Transfer to a cutting board and slice into bite sized squares. Enjoy! I don’t even know.
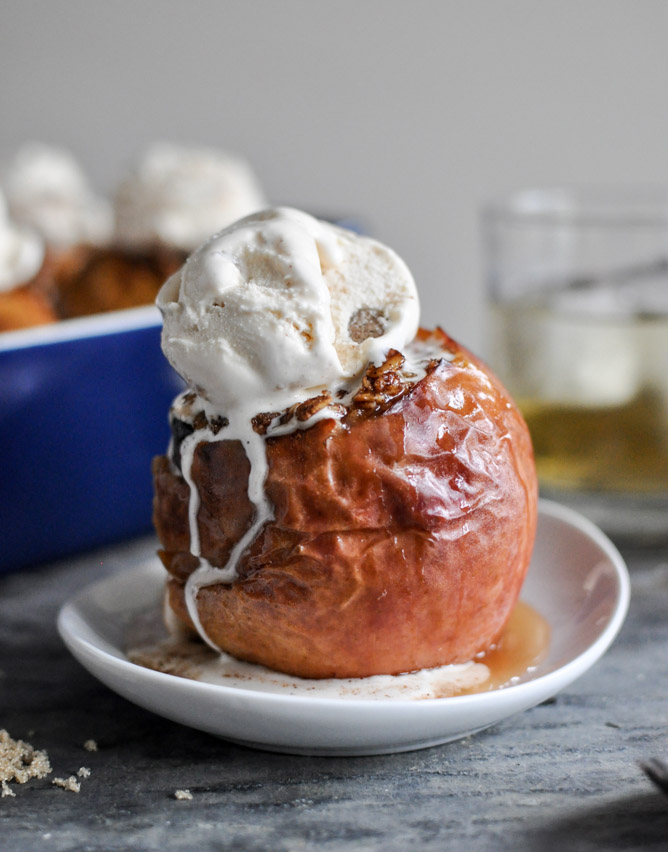
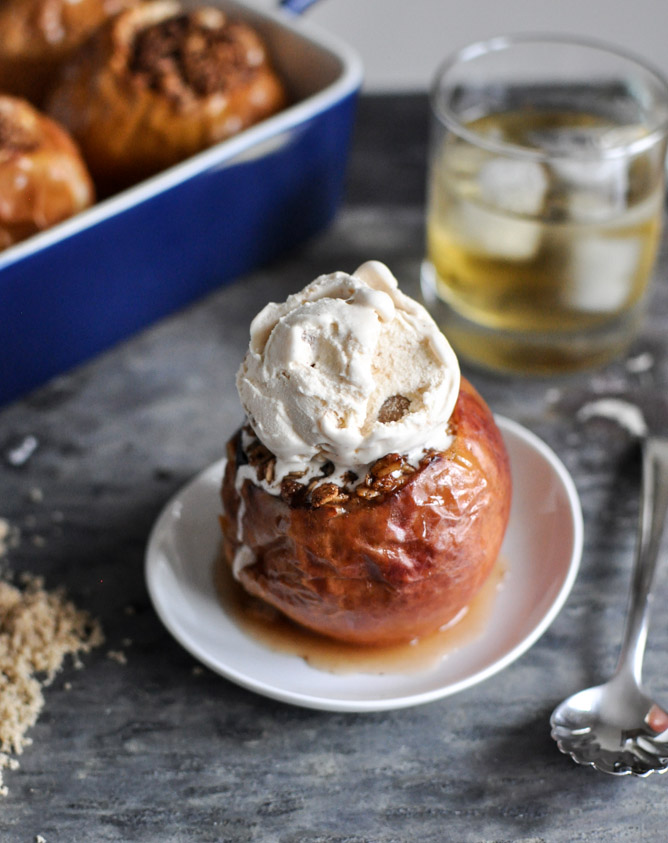
I just… poured bourbon on the apples. ON the apples. And baked them. And covered them in cinnamon ice cream.
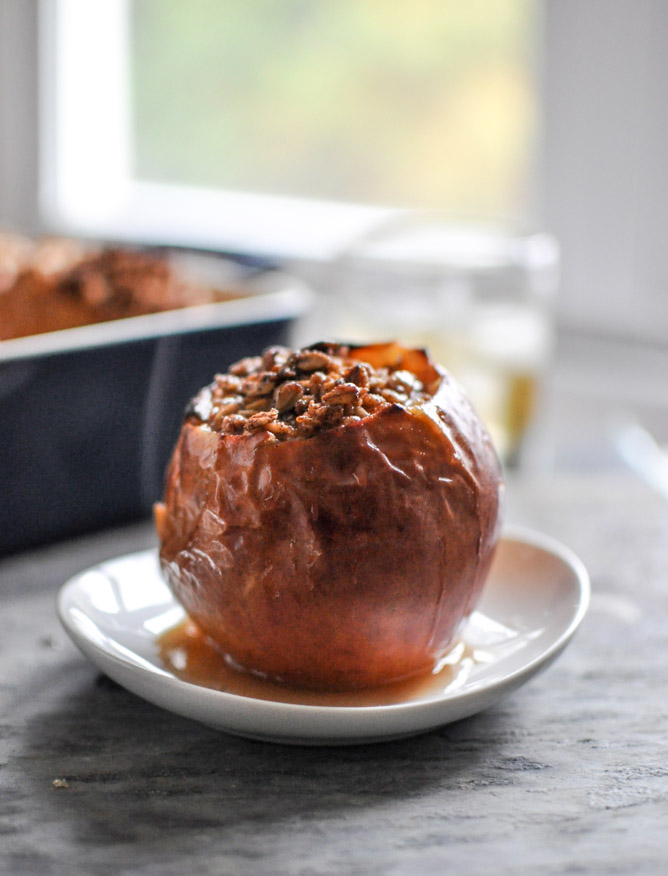
Oh and stuffed them with my favorite crispy crumble mixture. It’s like… apple crisp.
Apple crisp baked inside an apple.
Covered in bourbon.
Covered in ice cream.
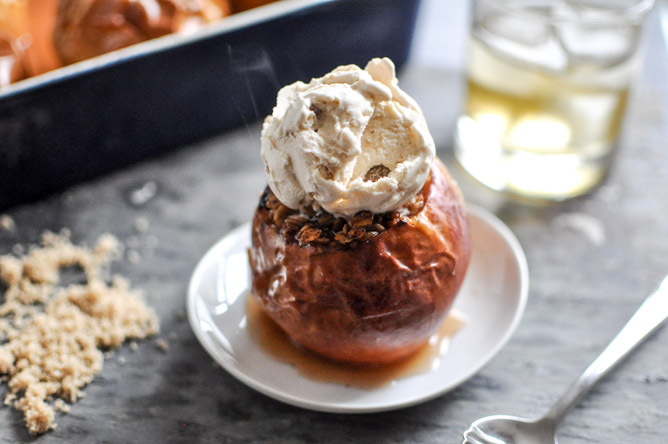
I don’t know why I do these things.
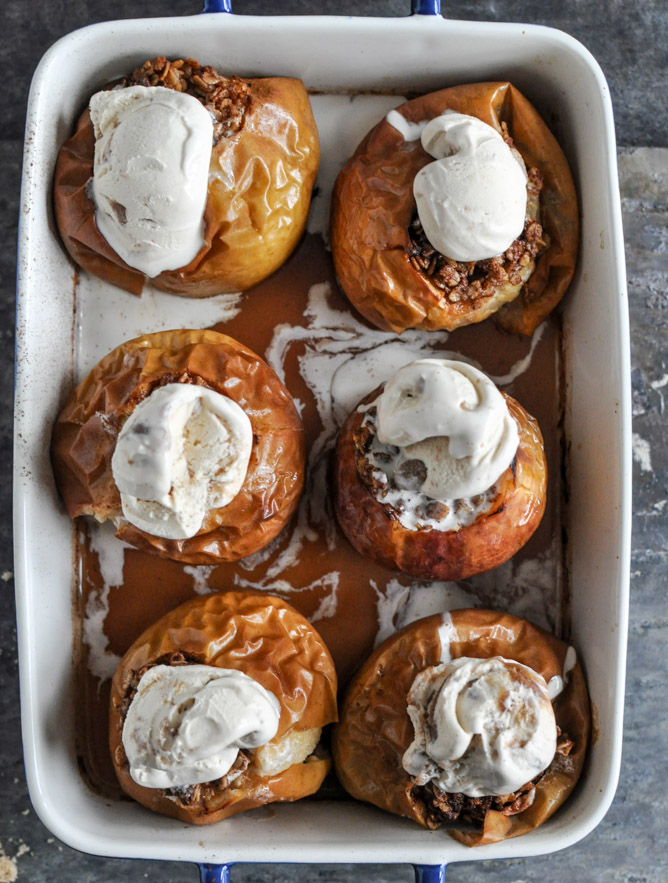
Bourbon not your thing? Pretty sure you could use rum here. Spiced rum? It is fall after all. Maybe some sort of other delicious liqueur or something? What about red wine?
Ooooh.
Crap.
Now I have to make these again.
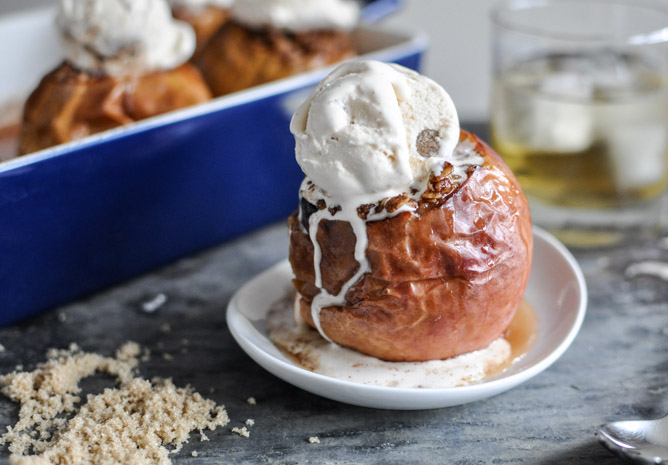
Bourbon Baked Apples
Yield: makes 6 apples
Prep Time: 20 minutes
Cook Time: 45-50 minutes
Total Time: 1.5 hours
Ingredients:
6 large honeycrisp apples
2/3 cup oats
2/3 cup loosely packed brown sugar
1/4 cup flour
1/2 teaspoon cinnamon
1/4 teaspoon salt
1/4 cup softened unsalted butter
1 teaspoon vanilla extract
1 cup apple cider
1/3 cup bourbon (or less, depending on how much you enjoy bourbon)
cinnamon ice cream for serving (or pumpkin! or vanilla.)
Directions:
Preheat oven to 400 degrees F. Core the apples - but not all the way - using an apple corer or a paring knife. You want to cut about 2/3 of the way down to remove the seeds if you don't have an apple corer. Carefully cut a circle around the stem and cut about an inch downward. From there, use the same knife or a spoon, remove the core and the seeds.
In a bowl, combine oats, brown sugar, flour, salt and cinnamon. Add softened butter and vanilla, and mix thoroughly with a fork and your hands until it becomes clumped together. If desired, you can also add nuts here! Stuff the mixture equally inside each apple. Sprinkle with additional cinnamon if desired.
Place apples in a large baking dish. Pour apple cider and bourbon in the bottom of the pan, then bake for about 45 minutes. This will depend on the exact size of your apples (if using small/medium apples, start by baking for 30 minutes), but it is easy to keep an eye on them because a few times during the cooking process (every 10 minutes or so), you want to spoon the cider/bourbon mixture overtop of each apple. Once the skin looks all wrinkly and slightly darker in color, remove from the oven. Serve immediately with ice cream on top.
mini whiskey oatmeal cream pies.

You know those little snack cakes and individually-wrapped treats that every kid had in their brown-bagged lunch growing up?
I wasn’t that kid. I was the girl with a dinosaur-print thermos full of chicken noodle soup, a plastic bag full of enough carrots to feed a bunny family of 20, and a little can of tomato juice. Weirdest lunch ever, right?
Growing up, my parents never kept any junk food in the house. No candy. No ice cream. No cupcakes. If I wanted a snack, I had to make the tough choice between dehydrated apple slices or vegetables. A few times, my afternoon snack was sauerkraut. Seriously. Sauerkraut. I can’t make this stuff up.
I wonder if my sugar-free childhood had any influence on my decision to go to culinary school and study baking and pastry…

I know my parents had good intentions, keeping the house free of junk food and unhealthy stuff. I totally get it, and I’m actually glad I grew up that way. I didn’t grow up craving foods packed full of artificial flavors, colors, chemicals and preservatives. If I want something sweet, I make it myself.
I’ve never had a Twinkie, or a Snowball, or a Ding Dong, or a Good Time Snackie Cake. That last one’s a real thing, right?
So when Ryan told me how much he loved those little oatmeal cream pies when he was a kid, I knew I had to try my hand at making them! Little itty bitty teeny tiny miniature oatmeal cream pies. They’re adorable! They’re delicious!
…And did I mention they’re full of whiskey? Yup!

Yes friends, these are certainly not the oatmeal cream pies you grew up with–they’re 24928 times better. Honest!
According to my husband, these little babies are in his top three most favorite cookie-type confections I’ve ever baked. Ever! They’re kind of a big deal.
Plenty of brown sugar keeps the oatmeal cookies moist and soft. They’re lightly spiced with cinnamon and vanilla, and good luck not eating all of them before you even get around to assembling the mini pies. They’re damn good cookies on their own. If I were feeling particularly naughty, I might even break up a bunch of them, toss ‘em in a bowl, pour over some milk and call that breakfast. Yes.

And the marshmallow cream?! Guys. This stuff is so, so, so delicious. Technically it’s not really marshmallow cream, it’s really a sweet Swiss meringue, the base for my favorite type of buttercream. But I’ll be damned if this brown sugar whiskey-spiked meringue doesn’t taste, act and look exactly like marshmallow cream. Actually, I think it might even be more delicious. Shh. Don’t tell.

If you’re craving a grown-up version of a childhood favorite, you simply must make these mini whiskey oatmeal cream pies! They’re perfect for St. Patrick’s Day, too! Whiskey and oatmeal, together at last!

Mini Whiskey Oatmeal Cream Pies
Yield: 24 miniature oatmeal cream piesThe recipe for the marshmallow cream will yield more than you need to fill the cookies, so store it in an airtight glass jar at room temperature for up to two weeks--if it lasts that long!
Ingredients:
For the Oatmeal Cookies
6 ounces whole wheat pastry flour
0.25 ounces baking powder
0.13 ounces baking soda
1 teaspoon ground cinnamon
1 stick (4 ounces) unsalted butter, at room temperature
8 ounces light brown sugar, packed
½ teaspoon kosher salt
2 large eggs
2 teaspoons pure vanilla bean paste (substitute pure vanilla extract)
½ ounce whole milk or half & half
½ ounce Irish whiskey
5 ounces quick-cooking rolled oats
For the Brown Sugar Whiskey Marshmallow Cream
4 ounces egg whites (about 4 eggs' worth)
8 ounces light brown sugar, packed
pinch of kosher salt
2 tablespoons Irish whiskey
2 teaspoons pure vanilla bean paste (substitute vanilla extract)
Directions:
For the Oatmeal Cookies
Preheat the oven to 375 degrees F, with a rack in the center.
Line a baking sheet with parchment paper and set aside.
Sift the flour, baking powder, baking soda and cinnamon into a bowl and set aside.
In the bowl of a stand mixer with the paddle attachment fitted on, combine the butter, brown sugar and salt. Cream together on medium speed for 8-10 minutes, or until very pale and fluffy.
With the mixer off, scrape down the sides of the bowl.
Turn the mixer on low and add the eggs, one at a time, waiting until the first is incorporated into the mixture before adding the second.
Scrape down the sides of the bowl, and add the vanilla, milk and whiskey on low speed until just combined.
Slowly add the sifted dry ingredients to the mixer bowl, and mix on low until just combined and the dough comes together.
Turn the mixer off and stir in the oats by hand using a silicone spatula.
Using a small cookie scoop (mine holds approximately one teaspoon of dough), portion the cookie dough onto the prepared baking sheet, leaving about two inches of room in between cookies.
Bake at 375 degrees F for 5-8 minutes, or until the cookies are light brown and crisp at the edges.
Remove from the oven and allow to cool on the baking sheet for 3-5 minutes before transferring the cookies to a wire baking rack to cool completely.
For the Brown Sugar Whiskey Marshmallow Cream
Set a saucepan with about 2-3 inches of water over medium heat and allow to heat until steaming.
Combine the egg whites, brown sugar and salt in either the metal bowl of your stand mixer, or another heat safe bowl.
Place the bowl over the steaming pan of water, making sure the bottom of the bowl doesn't touch the water.
Whisking often, gently heat this mixture until the sugar is dissolved. Feel the mixture with your fingers (you can wear a glove!) to check for doneness.
When the mixture is no longer grainy, remove the bowl from the saucepan. Place the bowl on the stand mixer with the whisk attachment fitted on.
Whip this mixture on medium-high speed for 8-12 minutes, or until the meringue is light, fluffy and voluminous, and the sides of the bowl are no longer hot.
Turn the mixer off and add the whiskey and vanilla bean paste, and whisk on medium for 30 seconds, or until combined.
Using a spatulate, transfer the marshmallow cream to a piping bag with a small round tip fitted on.
Assembling the Oatmeal Cream Pies
Place one cooled cookie face down on a piece of parchment paper, and pipe about 2 teaspoons' worth of marshmallow cream in the center.
Place a second cookie on top, pressing down gently in the center to coax the marshmallow cream to the outer edges of the cookie sandwich.
Repeat with the remaining cookies until all miniature oatmeal cream pies are assembled. Depending on how large you made your cookies, you should get approximately 24 pies.
Store the oatmeal cream pies in an airtight container at room temperature for two days, or in the fridge for up to four.
 With
fall lingering in the air down South - and throughout the rest of the
country - the chilly weather can only mean one thing: it's pie season
down in Dixie.
 While the fruity pies of summer
are perfectly acceptable, I must admit that I'm a winter pie kind of
girl. Give me pumpkin, sweet potato, and pecan over berries any day. So
when a colleague recently requested that I make "something with
butterscotch," I didn't have to think too hard about it. Needless to
say, I happily obliged.
There's a bevy of butterscotch pie recipes floating around the food world. Trust me, I know. I've made (and eaten) my fair share of them. And while I love a cool butterscotch cream pie in the summer, I really crave a dark and rich sort of pie once October creeps in... a broody pie with the intense flavors of nutty browned butter and sugary sweet caramel. Yes, please.
This old Southern favorite is a great way to celebrate the season. Add a splash of bourbon and you've got yourself a party. Whether you bring this butterscotch pie to a fall festival or serve it on your holiday table, it's guaranteed to wrap you up in warmth.

Browned Butter Butterscotch Pieserves 8 to 10
For the filling
1 standard pie crust, blind-baked and cooled (Recipes: Sour Cream Pie Crust or Basic Pie Crust)
1/2 cup (1 stick) unsalted butter
1 cup plus 2 tablespoons dark brown sugar, packed
1/4 cup cornstarch
3 tablespoons flour
1/2 teaspoon salt
1 (12 ounce) can evaporated milk
1/2 cup milk (I used 2%)
4 egg yolks, lightly beaten
1 tablespoon bourbon whiskey
For the whipped cream
1 cup heavy whipping cream
3 tablespoons confectioners' sugar
1 teaspoon vanilla
For the filling
In a medium saucepan, melt butter over medium heat. Continue to cook until lightly browned, stirring occasionally, approximately 10 minutes. Add brown sugar to butter and cook until sugar is completely melted and a paste is formed.
Combine evaporated milk and regular milk and pour into the butter/brown sugar mixture. Bring to a simmer and stir until it is smooth and the sugar is completely dissolved.
In a separate bowl, combine cornstarch, flour, and salt. Pour 1/ 2 cup of the milk/butter/sugar mixture into the cornstarch mixture and whisk until smooth. Pour the smooth cornstarch mixture back into saucepan, stirring constantly. Cook for approximately one minute, until just thickened (cooking the cornstarch much longer can actually cause it to lose its thickening ability).
Stream 1/2 cup hot milk/butter/sugar mixture into the egg yolks, stirring constantly (this is called tempering; it prevents the yolks from curdling in the heat). Pour this mix back into the saucepan. Cook for approximately 30 seconds to one minute, and then remove from heat. Stir in whiskey. Allow to cool until warm, about 10 to 15 minutes. Strain filling through a fine mesh sieve and then pour into cooked piecrust.
Press a piece of plastic wrap directly on the surface of the pudding in order to prevent a skin from forming. Chill overnight, or until firm.
For whipped cream
In a medium-sized bowl, whip the heavy cream with an electric mixer until foamy and starting to thicken. Add confectioners' sugar and vanilla and continue to beat until soft peaks are just formed.
If serving whole pie, top with whipped cream and slice. If serving just a few pieces, slice and serve with a dollop of whipped cream.Behold: chocolate bourbon toffee cookies!
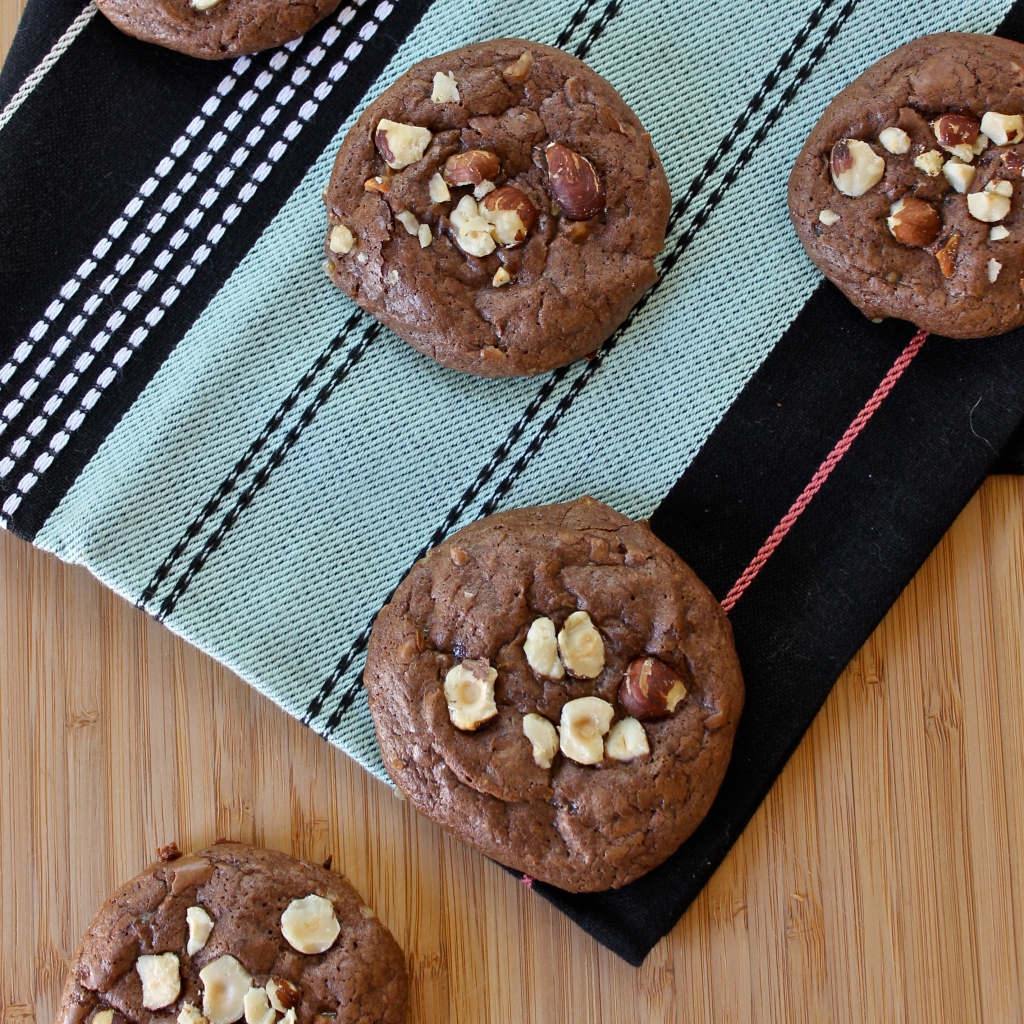
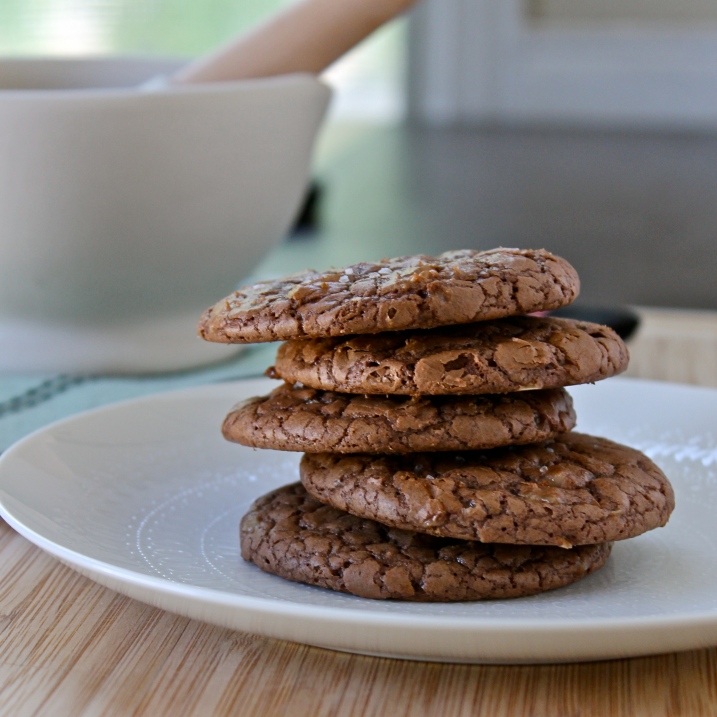 It’s easy to get over the tragedy of a lost pie when you have rich and chewy cookies spiked with bourbon. Pie? Whatever.Chewy Chocolate Bourbon Toffee Cookie
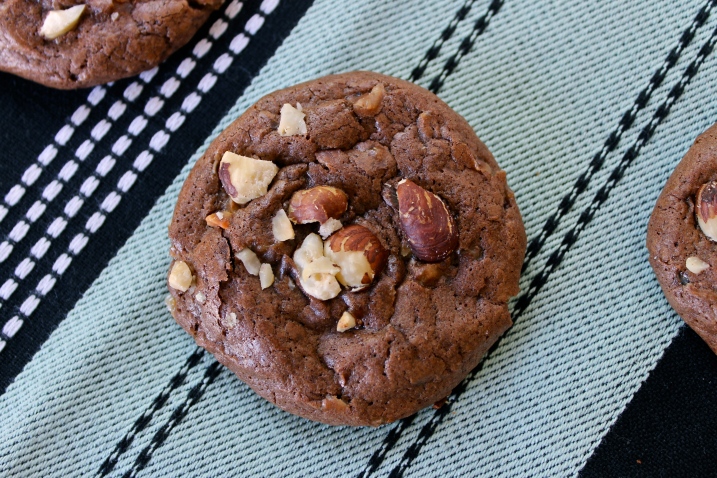 These are dangerous. I found this
recipe for salted chocolate toffee cookie and went at it, adding just a
bit of bourbon. I baked half the batch as suggested in the recipe with a
sprinkle of salt on top, but then realized I had about 4 tablespoons of
chopped hazelnuts left in the cupboard so baked the second round of
cookies with nuts on top. Verdict? Perfection.
Adapted from Sel Et Sucre
Makes 3 Dozen Cookies
Ingredients:
2 C Semisweet Chocolate Chips
6 T Unsalted Butter, sliced
1 C All Purpose Flour
¾ tsp Baking Powder
¾ tsp Salt
3 Large Eggs
1 C Brown Sugar, packed
1 tsp Vanilla Bourbon Extract
2 T Bourbon
1 ¼ C Toffee Pieces
Coarse Sea Salt (optional)
1/4 Chopped Hazelnuts
Directions: Preheat oven to 350 Degrees F. In a heatproof bowl over a pan of simmering water, melt butter and chocolate chips. Set aside to cool slightly.
In a medium bowl, whisk together the flour, baking powder, and salt.
In a stand mixer with a paddle attachment, beat the eggs, brown sugar, vanilla and bourbon on high speed until light and fluffy, approx 5 min.
On low speed, beat in the melted chocolate and butter. Fold flour mixture in by hand until just combined then stir in toffee bits.
Drop dough onto parchment lined baking sheet in 2 T sized scoops. Sprinkle with coarse sea salt if desired or press a few pieces of chopped nuts into the dough. Bake on a rack centered in the oven for 12 minutes or until the cookies have shiny, cracked surfaces and are firm to touch at the edges but still somewhat soft in the middle. Let cool five minutes on the sheet before transferring to a wire rack.




 Charles Maraia
 Deborah Ory
 Tina Rupp